- Other Fluke companies:
- Fluke
- Fluke Biomedical
- Fluke Networks
- Fluke Process Instruments
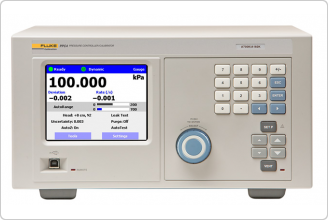
PPC4E Pressure Controller/Calibrator
This product is discontinued. Please see the 6270A Pressure Controller/Calibrator.
Superior rangeability and reliability for pressure gauge calibration
± 0.02 % of AutoRanged spans from ± 1 kPa (0.15 psi) to 14 MPa (2,000 psi)
The Fluke Calibration PPC4E pressure gauge calibrator brings high performance to a wide range of pneumatic pressure calibrations, from the cal lab to production or field calibration environments. Move up to the well-known reliability and precision of Fluke Calibration PPC pressure controller/calibrators and enjoy great value and return on investment.
PPC4E combines the best features, measurement technology, and patented PPC pressure control from our PPC4 family of controller/ calibrators to deliver extremely broad pressure range coverage at a level of performance that addresses your most common calibration workload. Calibrate transmitters, transducers and analog and digital gauges with ease using the color graphical user interface, or automate through remote connection to a PC. PPC4E makes it extremely easy to ensure that you’re getting the performance and uncertainty you need for all of your pressure gauge calibrations. PPC4E’s AutoRange feature instantly sets up multiple parameters to achieve optimum precision, safety, and measurement performance anywhere in its pressure range. Users simply enter the range and tolerance of the unit under test. PPC4E’s measurement uncertainty is then a percentage of a span that is aligned with the UUT range, providing an easy-to-understand test accuracy ratio.
Rangeability of PPC4E models
Models are designated either PPC4E or PPC4EX, indicating either one or two internal reference pressure transducers and defining the minimum AutoRange span that can be selected while still maintaining the calibrator’s best measurement uncertainty. Nominal measurement uncertainty is ± 0.02 % of AutoRanged span for any AutoRange down to:
PPC4E 10 % of controller span
PPC4EX 1 % of controller span
See PPC4E measurement specifications for details. Fluke Calibration provides a complete and reliable product measurement uncertainty specification including all sources and valid for one year.
Features at a glance
- Switch between absolute, gauge and bidirectional gauge modes and meet easy-to-understand full-year measurement specifications without added hardware or special calibration or maintenance operations
- Controls pressure over the absolute range of 1 kPa (0.15 psi) to 14 MPa (2,000 psi) and gauge equivalent, including very low differential pressures
- Up to 100:1 accurate measure and control range turndown can truly be realized by a single calibrator
- AutoRange feature optimizes and sets measurement, control and safety features for the specific range of the test being run with a few simple entries
- RS-232 and IEEE-488.2 remote interfaces included. Valve drivers built-in for ATE system design
- Self purging liquid trap accessory available to automatically protect PPC4E from system contamination
- Measurement uncertainty is calculated real-time and displayed in the current pressure units
- On-board, programmable calibration sequences and leak testing routines
- Set point jog feature to quickly perform cardinal point calibrations of analog gauges
- Standard color graphical user interface with full support in 11 languages
Realize control precision and low uncertainty over the entire PPC4E range
PPC4E may take the place of two or more pressure controllers. There’s no need for two separate control modules in PPC4E. Control precision better than ± 0.0006 % of the controller’s span, and up to ten times tighter at the low end, allows users to take full advantage of precision in typical dynamic control operation. PPC4Es quartz sensor technology is also superior to that of other controller/calibrators in its class. PPC4E gives you all the range and precision you need with a single interface and a single test port.
Easy-to-use, information-packed user interface
Operation of PPC4E from its local user interface offers you instant optimization of all its important settings and parameters to the range and accuracy of your UUT with a few touches of a button using the AutoRange function. Operators will find common calibration tasks simple to perform without specialized training or experience.
PPC4E supports setting up and running quick tests on the fly and creating and storing test sequences for recall and execution. A “jog" feature allows for the pressure at each target point to be manually adjusted so the UUT reads a cardinal target pressure, a useful feature for analog gauge calibration. When running a test sequence, the PPC4E measured pressure corresponding to each UUT cardinal point is recorded and displayed later for reporting. Uncertainty of the measured or delivered pressure is calculated and displayed continuously by PPC4E. The calculation uses uncertainty components based on PPC4E specifications and the component values can be tailored by the user.
COMPASS® software for automation
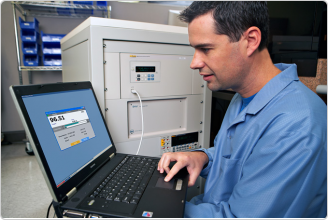
PPC4E is ready for integration into a fully automated test system. Rear panel RS-232 and IEEE-488.2 interfaces are included for communication with a remote computer. Remote operation is supported by a complete set of easy-to-use, well documented command strings.
Fluke COMPASS for Pressure calibration software provides an off-the-shelf path to automation, enabling you to realize the benefits of automation without dedicating your engineering resources to create a custom program. COMPASS for Pressure has the power and flexibility to automate nearly any level of testing imaginable, including all aspects of test execution, data acquisition and report generation, whether for a bench top calibration system or a complete, multi-function sensor test stand.
Fluke Calibration also offers integrated, turnkey calibration systems including pressure generation, control and data acquisition hardware in solutions ranging from mobile carts to attractive, small-footprint rack systems.
PPC4E General Specifications |
|
| Warm up time | None required, 30 minute temperature stabilization recommended for best performance from cold power up |
| Resolution | To 1 ppm, user adjustable |
| Power requirements | 100 to 240 VAC (-15%, +10%), 50-60 Hz, 70 VA max consumption |
| Operating temperature range | 10 to 40 °C |
| Weight | 16.6 kg (36.5 lb) |
| Dimensions | 19 cm H x 35 cm W x 45 cm D (7.5 in. x 13.8 in. x 17.7 in.) |
| Remote communication interfaces | RS232 (COM1, COM2), IEEE-488.2, USB (front panel, firmware load only) |
| Operating medium | Any clean, dry, non-corrosive gas |
| Pressure connections | |
| TEST (+), TEST (-): | 1/8 in. NPT F |
| SUPPLY: | 1/8 in. NPT F |
| EXHAUST: | 3/8 in. NPT F |
| ATM: | 10-32 UNF |
PPC4E measurement uncertainty (includes precision and one year stability)1,2 |
|
| PPC4EX 14M | Gauge uncertainty1,3 % of AutoRanged span: 0.02 Minimum AutoRanged span [kPa]2: 140 Absolute uncertainty1,4 % of AutoRanged span: 0.02 Constant [kPa]: 0.1 Minimum AutoRanged span [kPa]2: 140 |
| PPC4E 14M | Gauge uncertainty1,3 % of AutoRanged span: 0.02 Minimum AutoRanged span [kPa]2: 1400 Absolute uncertainty1,4 % of AutoRanged span: 0.02 Constant [kPa]: 1 Minimum AutoRanged span [kPa]2: 1400 |
| PPC4EX 7M | Gauge uncertainty1,3 % of AutoRanged span: 0.02 Minimum AutoRanged span [kPa]2: 70 Absolute uncertainty1,4 % of AutoRanged span: 0.02 Constant [kPa]: 0.05 Minimum AutoRanged span [kPa]2: 70 |
| PPC4E 7M | Gauge uncertainty1,3 % of AutoRanged span: 0.02 Minimum AutoRanged span [kPa]2: 700 Absolute uncertainty1,4 % of AutoRanged span: 0.02 Constant [kPa]: 0.5 Minimum AutoRanged span [kPa]2: 700 |
| PPC4EX 1.4M | Gauge uncertainty1,3 % of AutoRanged span: 0.02 Minimum AutoRanged span [kPa]2: 14 Absolute uncertainty1,4 % of AutoRanged span: 0.02 Constant [kPa]: 0.014 Minimum AutoRanged span [kPa]2: 70 |
| PPC4E 1.4M | Gauge uncertainty1,3 % of AutoRanged span: 0.02 Minimum AutoRanged span [kPa]2: 140 Absolute uncertainty1,4 % of AutoRanged span: 0.02 Constant [kPa]: 0.1 Minimum AutoRanged span [kPa]2: 140 |
| PPC4EX 100K | Gauge uncertainty1,3 % of AutoRanged span: 0.02 Minimum AutoRanged span [kPa]2: ± 1 Absolute uncertainty1,4 % of AutoRanged span: 0.02 Constant [kPa]: 0.014 Minimum AutoRanged span [kPa]2:70 |
| PPC4E 100K | Gauge uncertainty1,3 % of AutoRanged span: 0.02 Minimum AutoRanged span [kPa]2: ± 10 Absolute uncertainty1,4 % of AutoRanged span: 0.02 Constant [kPa]: 0.014 Minimum AutoRanged span [kPa]2: 70 |
| PPC4E 15K | Gauge uncertainty1,3 % of AutoRanged span: 0.02 Minimum AutoRanged span [kPa]2: ± 1.5 |
- Maximum deviation of the RPT indication from the true value of applied pressure including precision, predicted one year stability limit, temperature effect and calibration uncertainty, combined and expanded (k=2) following the ISO “Guide to the Expression of Uncertainty in Measurement."
- For AutoRange spans below the Minimum AutoRanged span uncertainty is equal to the value at the Minimum AutoRanged span.
- Gauge uncertainty is a % of AutoRanged span. For example, an AutoRanged span of 3 500 kPa on model PPC4E 7M would have uncertainty of (0.02% * 3 500 kPa) = 0.35 kPa.
- Absolute uncertainty is the sum of a % of AutoRanged span and a Constant that accounts for zero drift. For example, an AutoRanged span of 80 kPa on model PPC4EX 100K would have uncertainty of (0.02% * 80 kPa + 0.014 kPa) = 0.03 kPa.
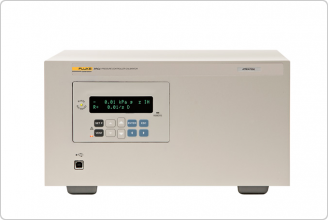
On-board barometer
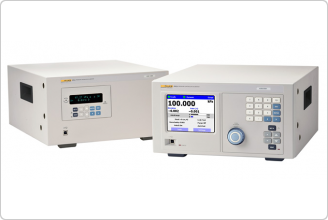
The on-board barometer is used only to measure changes in atmospheric pressure to provide dynamic compensation of an absolute RPT’s atmospheric pressure offset in gauge measurement mode with PPC4E models other than PPC4E 15k.
On-board barometer |
|
| Warm up time | None required |
| Range | 70 to 110 kPa (10 to 16 psi) |
| Resolution | 0.001 % of span |
| Precision Predicted stability |
0.1 % of span 0.05 kPa/yr (0.008 psi/yr) |
Pressure control specifications |
|
| Control precision | PPC4E: ±0.0006% of controller span PPC4EX: ±0.0006% of controller span (AutoRanged span >10% of controller span) ±0.00006% of controller span (AutoRanged span ≤10% of controller span) |
| Lowest controllable pressure (gauge mode) |
Zero set by automated venting. Lowest point above or below zero limited only by RPT resolution and control precision. |
| Lowest controllable pressure (absolute, negative gauge modes) |
1 kPa absolute (0.15 psia) or gauge equivalent, for all models except PPC4E 7M and PPC4E 14M 3.5 kPa(0.5 psia) for PPC4E 7M 7 kPa(1 psia) for PPC4E 14M |
| Ultimate pressure (absolute, negative gauge) Depending on vacuum pump and connections |
200 to 700 Pa absolute(2 to 7 mbar, 0.03 to 0.1 psia) or gauge equivalent |
| Typical pressure setting ready time (0.005% hold limit, 50 cc test volume) |
15 to 30 s |
| Slew time (ATM to FS with 50 cc test volume) |
30 s |
| Typical test volume | 0 to 1000 cc for Controller Range of 1.4 MPa [300 psi] or less 0 to 500 cc for Controller Range greater than 1.4 MPa [300 psi] |
| Default dynamic control hold limit | ± 0.01 % of current range |
| Model Name | Description |
|---|---|
| PPC4E 15K |
PPC4E Controller/Calibrator Hi RPT: BG15K Pressure range (nominal measurement range) |
| 6241-15K |
PPC4E Gas Pressure Controller Kit with PPC4E 15K, ± 1.5 to ± 15 kPa (± 0.2 to ± 2.2 psi) Includes:
|
| 6241-100K |
PPC4E Gas Pressure Controller Kit with PPC4E 100K, ± 10 to ± 100 kPa (± 1.5 to ± 15 psi) Includes:
|
| 6241-1.4M |
PPC4E Gas Pressure Controller Kit with PPC4E 1.4M, 140 to 1,400 kpa (20 to 200 psi) Includes:
|
| 6241-7M |
PPC4E Gas Pressure Controller Kit with PPC4E 7M, 700 to 7,000 kPa (100 to 1,000 psi) Includes:
|
| 6242-100K |
PPC4E Gas Pressure Controller Kit with PPC4EX 100K, ± 1 to ± 100 kPa (± 0.15 to ± 15 psi) Includes:
|
| 6242-1.4M |
PPC4E Gas Pressure Controller Kit with PPC4EX 1.4M, 14 to 1,400 kpa (2 to 200 psi) Includes:
|
| 6242-7M |
PPC4E Gas Pressure Controller Kit with PPC4EX 7M, 70 to 7,000 kPa (10 to 1,000 psi) Includes:
|
| 6242-14M |
PPC4E Gas Pressure Controller Kit with PPC4EX 14M, 140 to 14,000 kPa (20 to 2,000 psi) Includes:
|
Accessories common to all models:
| Accessory | Description |
|---|---|
| PK-PPC-BG-DVU |
Dual volume unit for use with BG15K Q-RPT |
| Rack Mount Kit |
Rack Mount Kit Rack mount kit for 19 in. rack. |
| RPM4 |
Reference pressure monitor for external Q-RPTs and/or absolute mode AutoZ. |
| RS232 |
9 pin, 2m for PPC4E COM1 |
| Reference vacuum kit, 220 V |
Vacuum pump package for PPC EXHAUST port. Includes connections |
| Reference vacuum kit, 110 V |
Vacuum pump package for PPC EXHAUST port. Includes connections |
| COMPASS for Pressure |
Software to automate testing, data acquisition, reporting and asset management |
| Priority Gold Instrument CarePlan |
Fluke Calibration Priority Gold Instrument CarePlans are available for most calibration products. Please contact your local Fluke Calibration sales representative for details or to request a quote. You may also call the Customer Care Center at 800-882-6153 or send email to premiumcare@fluke.com. |
| Silver CarePlan |
Fluke Calibration Silver CarePlans are available for most calibration products. Please contact your local Fluke Calibration sales representative for details or to request a quote. You may also call the Customer Care Center at 877-355-3225 or send email to careplans@flukecal.com. |
| Product Manuals |
|---|
| Application Notes |
|---|
| Instruction Sheets |
|---|
- Home
- Products
- New Products
- Electrical Calibration
- RF Calibration
- Data Acquisition and Test Equipment
- Temperature Calibration
- Humidity Calibration
- Pressure Calibration
- Flow Calibration
- Process Calibration Tools
- Calibration Software
- Service and Support
- All Calibration Instruments
- Handheld Test Tools
- Purchase Info
- News
- Training and Events
- Literature and Education
- Service and Support
- Service Request (RMA)
- Service Plans
- Technical Support
- Knowledge Base
- Accreditations
- Authorized Service Centers
- Calibration Certificates
- Community Forum
- My MET/SUPPORT
- Product Manuals (User Guides)
- Safety Data Sheets (SDS)
- Recycle Program
- Safety, Service, and Product Notices
- Software Downloads
- Warranties
- Tools
- About Us
Sidebar Request a Quote
Request a quote


